

If you’re looking to future-proof your network and know that your infrastructure can hold up to growing network demands, then Cat8 is the way to go.
It may seem like overkill because most scenarios don’t need that much data passed so quickly, but the future comes quickly, and being over prepared is a smart strategy.
In this article we will show you how to terminate Cat8 modular plugs with tools being optional.
Why use Cat8 vs Fiber?
Choosing between Cat8 Ethernet cables and fiber optics for your network infrastructure involves considering several factors including performance, cost, and practical application.
Here’s a more detailed comparison to help you understand the benefits and drawbacks of each option.
Pros
-
Futureproof: You won’t need to install wiring again which can be a bigger headache and cost to some.
-
Cost-Effective: Cat8 cables are generally less expensive than fiber optic cables. The installation and maintenance costs are also lower because you don't need specialized equipment or highly trained personnel to install them.
-
Ease of Installation: Cat8 cables are easier to install compared to fiber optics. They do not require the precision and expertise needed for fiber splicing and termination.
-
Backward Compatibility: Cat8 cables are compatible with existing RJ45 connections, making them easier to integrate into current network infrastructures without the need for additional adapters or converters.
-
Durability: Cat8 cables are robust and can withstand rough handling and environmental stress better than fiber optic cables, which are more fragile and can be damaged more easily.
-
Power over Ethernet (PoE): Cat8 cables support PoE, allowing you to power devices like IP cameras, VoIP phones, and wireless access points through the network cable itself, eliminating the need for separate power supplies.
-
Short Distance High Speed: Cat8 is ideal for short-range high-speed data transfer, supporting speeds up to 40 Gbps over distances up to 30 meters (100 feet), making it suitable for data centers and server rooms.
Cons
-
Bulkiness and Rigidity: Due to their thickness (22-gauge copper), Cat8 cables are bulkier and less flexible, which can make them harder to route and manage in tight spaces.
-
Heat Generation: The higher electrical current in Cat8 cables can lead to more heat generation, which requires proper ventilation and cooling solutions in high-density installations.
-
Distance Limitations: Cat8 cables are limited to shorter distances (up to 30 meters) for optimal performance, which may not be suitable for larger installations.
-
Scammers Beware: Many websites sell fake Cat8 cables and it can be hard to navigate these waters
Step-by-Step Instructions to terminate Cat8:
For a visual guide, check out this video, or follow the written instructions below.
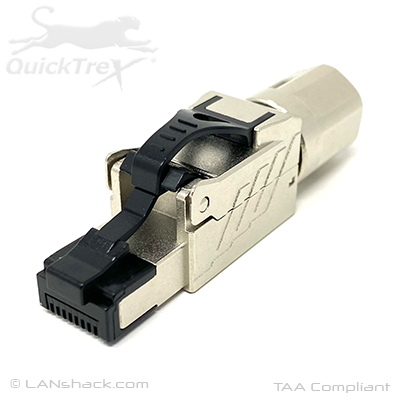
We sell Cat8 RJ45 modular plugs that are designed to work specifically with Cat8 Solid or stranded cables.
The contacts are gold-plated, and the wire alignment insert allows efficient termination without the need for tools. However, we do recommend using a cable cutter to trim off excess wire. The housing of the keystone jack is fully shielded to avoid corrosion and protect from EMI (Electromagnetic interference).
Tools Required:


-
Preparation:
-
Start by putting the end cap on the cable before terminating.
-
Gather your tools: a fiber stripper is essential, and needle-nose pliers can help but are not mandatory.
-
Strip the Cable:
-
Use the fiber stripper to remove about a finger's length of the cable jacket.
-
Peel back the braiding on the cable. Leave some extra braiding so you can wrap it around the cable jacket for added shielding and to prevent crosstalk.
-
Separate the Conductors:
-
Inside, you will find four twisted shielded pairs and a drain wire.
-
Wrap the drain wire around the cable jacket and the foil shielding to maintain the cable's shield.
-
Prepare the Shielding:
-
Pull off the shielding on each pair of cables, leaving 6-8 millimeters of foil on each pair.
-
Unwrap the foil from each pair of conductors.
-
Separate and Straighten the Conductors:
-
Separate the individual conductors. The conductors in Cat8 cables are thick, making them easier to untwist by hand.
-
Use needle-nose pliers to straighten each conductor, making them easier to work with.
-
Arrange the Conductors:
-
Pin 1: White/Orange
-
Pin 2: Orange
-
Pin 3: White/Green
-
Pin 4: Blue
-
Pin 5: White/Blue
-
Pin 6: Green
-
Pin 7: White/Brown
-
Pin 8: Brown
-
-
Refer to the B wiring diagram (568B standard) on the block.
-
Arrange the conductors according to the 568B standard to ensure the correct pinout:
-
Trim and Align Conductors:
-
Once you have arranged the conductors in the correct order, trim them flush.
-
Flip the low bar over and align the conductors according to the B configuration.
-
Insert Conductors into the Plug:
-
Insert the trimmed conductors into the modular plug, ensuring they are correctly aligned with the low bar markings.
-
Secure the Conductors:
-
Press the low bar with the conductors into the punch block built into the modular plug.
-
Apply pressure to ensure the punch block makes contact with each conductor and is properly installed.
-
Finalize the Termination:
-
Close the hinge on the modular plug.
-
Screw the endcap into the plug to hold everything securely in place.
-
Ensure the endcap is flush with the modular plug, indicating a properly completed termination.
-
Testing the Termination:
-
Insert a remote into one end of the terminated cable.
-
Use a network tester on the opposite end to check for continuity and ensure the termination is correct.
By following these steps, you should be able to successfully terminate a Cat8 toolless modular plug.