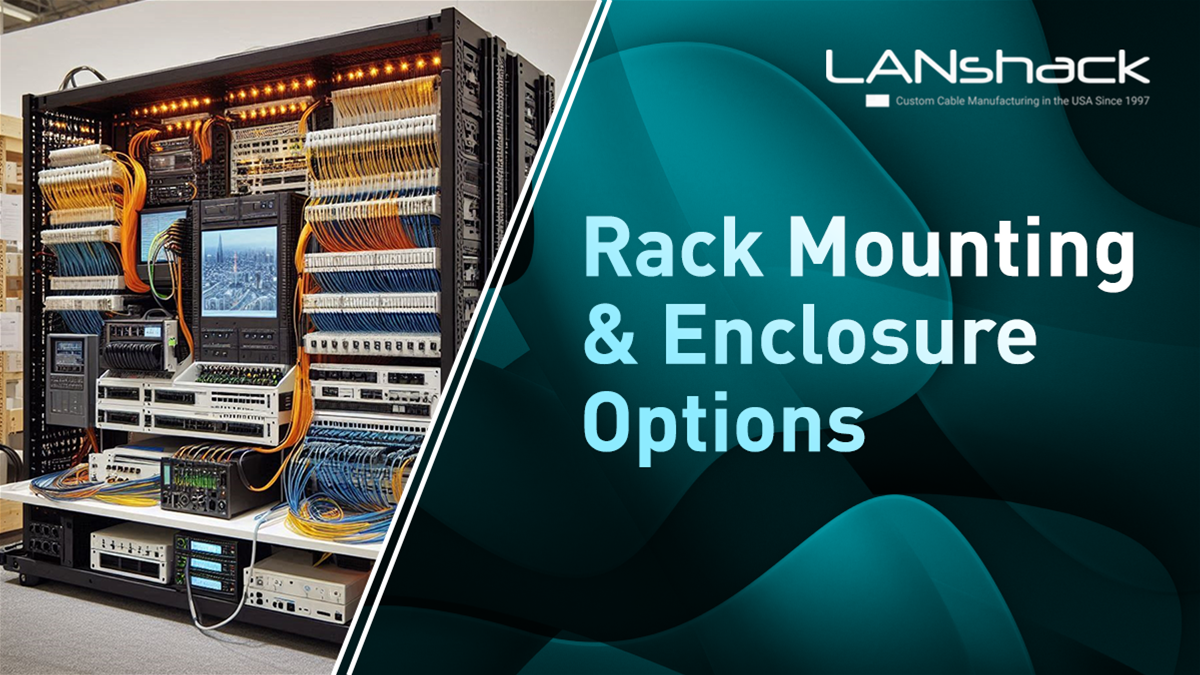


Whether you're setting up a new network or reorganizing an existing one, mounting racks and enclosures effectively is crucial for maintaining a clean, efficient, and accessible workspace.
In this guide, we'll walk you through different mounting options and the installation process for various components.
Let’s dive into the details!
1. Rack Mounting Options
We sell the three main types of rack mounts in our store. Each one serves a different purpose.
Open Frame Rack
An open frame rack is the most basic and flexible option available. It’s perfect for mounting ethernet switches, patch cables, fiber optic enclosures, and other network equipment.
Its open design allows for easy access and ventilation, making it ideal for environments where equipment needs to be frequently accessed.
This type of rack is particularly useful for smaller setups or for situations where cooling and airflow are crucial.
Network Cabinet / Server Cabinet
Network cabinets (or server cabinets) offer a more enclosed solution, providing additional security and organization for your network equipment.
Most server cabinets won’t have as much of a loading capacity. This cabinet includes 132 lbs of loading capacity while this open frame rack supports 300 lbs
They are designed to house servers, switches, and other critical hardware while protecting them from dust and physical damage.
Free Standing Relay Rack
A free-standing relay rack provides 22U of rack space and can be easily moved around, thanks to its wheels. The racks we offer can hold between 250 and 330 lbs of loading capacity.
This type of rack is particularly advantageous if you need flexibility in your setup. It allows you to pivot and access cabling with greater ease compared to stationary options.
2. Installing a 2-Panel 1U Rack Mount Enclosure
Preparation
Before mounting your 2-panel 1U rack mount enclosure, familiarize yourself with the layout of the rack.
Decide which U-space you want to use and ensure that the rack is correctly aligned.
Installation Steps
-
Attach the Enclosure: Secure the enclosure using the provided screws. Make sure to place screws in all four slots to ensure stability.
-
Add Rabbit Ears: Install the rabbit ears to further secure the enclosure.
-
Secure Cables: Use cable management tools to organize and secure cables within the enclosure.
-
Pull the Fiber In: Guide the fiber cables through the designated paths in the rack.
3. Installing an LGX Adapter Panel
Do you know what a fiber optic adapter panel looks like?
It's designed for coupling your pre-terminated fiber optic assemblies or your fusion splice pigtails. They can help organize your network and make sure that you can accommodate multiple connector variations you may have in your set up.
You might use LC duplex couplers, MTP couplers, ST simplex couplers or more in your installation so making sure you have an adapter panel is crucial.
LGX panels are used to house various types of fiber and coaxial connectors.
While you can use LGX panels for ethernet, most often they are used to run fiber optic cabling.
This MTP LGX adapter panel is designed for 12 or 24 fiber MTP fiber cables for example.
Installation Steps
-
Insert the Assembly: Align the 6-strand fiber assembly with the two mounting holes on the enclosure.
-
Cover Unused Slots: For a cleaner look, cover any unused slots with blank LGX plates.
-
Secure the Panel: Make sure the adapter panel is firmly attached and aligned correctly.
4. Installing a 6-Strand Single Mode Fiber Assembly
This process applies to all strand counts up to 288.
Here’s how to handle a 6-strand fiber assembly:
-
Feed the Fiber: Pull the fiber through the wall and remove the pulling eye.
-
Route the Fiber: Pass the fiber through the back of the rack.
-
Connect the Fibers: Plug the connectors into the adapter panel following TIA standards: Blue, Orange, Green, Brown, Slate, and White.
-
Manage Cables: Use Velcro straps to coil up and secure the fiber. Trim any excess Velcro to keep the setup tidy.
-
Close the Door: Once everything is in place, close the enclosure door.
5. Mounting a Vented Network Shelf
Vented network shelves are great for mounting equipment that cannot be mounted to the rails of your rack.
For example, if your network switch lacks SFP ports, you can place a media converter on the network shelf to provide SFP functionality within your rack.
What is an SFP module?
An SFP module is a small form factor pluggable device designed to transfer your fiber optic signal back to copper.
Why does it need to go back to copper when it starts as fiber in the first place?
Fiber often helps you go further distances in a more secure manner. Copper also has length limitations (up to about 325 feet) that fiber does not.
However, many end-user devices use copper ethernet ports like RJ45 to read the data transferred in. These end devices could be servers, switches, or storage systems not equipped with fiber. These devices might be vital to the infrastructure, but upgrading them to fiber might not be feasible due to cost or operational complexity. In this case, the fiber network needs to interface with copper to connect with these legacy systems.
Let's take data centers for example. Inside data centers, fiber is often used to connect between buildings or across different floors, but within individual racks or between closely located devices, copper can be used for short, high-speed connections.
SFP modules allow you to convert the fiber signal back to copper for these shorter runs, which are more cost-effective using Ethernet cables like Cat6 or Cat6A.
Installation Steps
-
Secure the Shelf: Insert and tighten all four screws to mount the shelf securely.
-
Place Equipment: Use the shelf to hold equipment such as HDMI splitters, small POE switches, or media converters.
Fiber Assembly Installation with SFP Module
We’re going to take two strands of the fiber assembly and connect them using an SFP module.
This switch has SFP ports, and we’ll use one of these ports with the SFP module to activate the switch, enabling the distribution of Ethernet ports. This will provide an internet connection to several offices and TVs in the installation we’re showcasing in this video.
Step-by-Step Process:
-
Remove the Plug on the SFP port on the switch
-
Insert SFP Module: Take your SFP transceiver or module and insert it into the switch.
-
Prepare the Fiber Optic Patch Cable:
-
We’re using a 3-meter cable for this live network demonstration, but we can make custom cables in any length, even as short as 6 inches, to keep your rack organized.
-
Remove Caps: Pop off the caps from the patch cable and prepare to use the first two ports.
Connecting the Patch Cable:
-
Insert the Cable: Plug the patch cable into the first adapter, ensuring it snaps securely into place.
-
Secure the Cable: Push the tray back and leave the cable coiled neatly.
Final Connection:
-
Remove Plugs and Caps: Carefully remove the SFP plug and the caps on the patch cable, avoiding contamination by not touching the ends.
-
Insert the Patch Cable: Insert the patch cable into the SFP module.
-
Check Connection: The switch should illuminate green, indicating a successful connection.
Activation:
-
With the switch live, you’re now ready to install Ethernet patch cables to activate all the devices on this network.
Installing a 1U horizontal wire management panel
Usage and Benefits
This wire management panel is ideal for routing both fiber and Ethernet cables, making it a versatile addition to any network setup.
By hiding and organizing patch cables, the panel not only improves the aesthetic appearance of your rack but also serves as a strain relief, preventing stress on the cables and keeping them organized.
To use the panel, start by popping off the front plate. Feed your patch cables into the channel, then replace the front plate to secure the cables.
The result is a much neater and more organized appearance, with cables tucked away and excess slack hidden.
The Product we’re Using
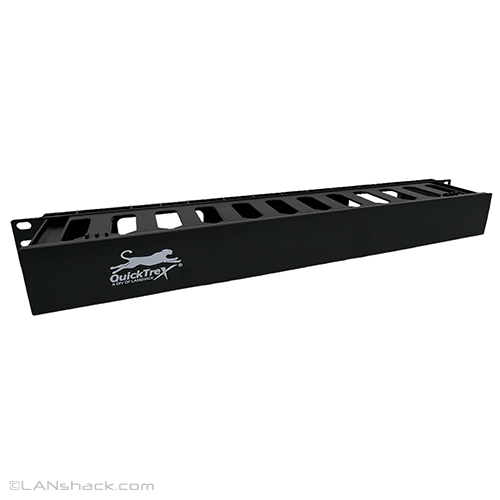

The QuickTreX® 1U Horizontal 1-Sided Rack Mount Wire Management Channel is an essential tool for keeping network cables neatly organized within cabinets and racks.
The product we’re using measures 1.75" in height, 19" in width, and 3" in depth.
This panel is designed to occupy one rack space and is compatible with 19" racks, hinged wall brackets, or any 19" mount cabinet or device.
It's particularly effective for controlling and managing patch cables, thanks to its finned design and channel cover that helps hide and take up excess slack. The panel is made of durable ABS plastic and comes with mounting screws, making it highly recommended for all installations.
The Installation Process
Installing the QuickTreX® 1U wire management panel is straightforward.
First, determine the optimal location on your rack where you want to install the panel; for example, we installed it on the 10U portion of the rack.
The panel comes with screws that have washers built in, ensuring a secure fit.
Once you've positioned the panel, insert all four screws and tighten them to secure the panel in place.
The process is simple and quick, ensuring that the panel is firmly attached and ready for use.
Example Scenario
To illustrate the panel's effectiveness, consider a setup where Ethernet cables from a main backbone need to be routed into a switch for three different offices.
The cables can be brought in through the bottom of the panel and then patched into the switch, using the panel to keep everything organized and tidy.
This not only enhances the professional look of the installation but also ensures that the network setup is functional and easy to manage.
Conclusion
Proper mounting and installation of racks and enclosures can significantly enhance the efficiency and organization of your network setup.
By following these guidelines, you’ll ensure a well-maintained and functional workspace.
For more details on the products mentioned, be sure to check out the links provided in the TikTok / Instagram videos.

